How Do You Know When Autolyse Is Done Sourdough
If artisan bread baking is a passion of yours, y'all've no dubiety come across the autolyse method (a brusque rest after combining flour and water) in recipes or blistering books. Have you wondered how using the autolyse method might transform your bread baking? Are yous uncertain how best to incorporate this powerful pause?
What is an autolyse?
An autolyse is the gentle mixing of the flour and water in a staff of life recipe, followed past a 20 to 60 minute rest flow. Afterward the residue, the remaining ingredients are added and kneading begins. This simple break allows for some rather magical changes to occur in your breadstuff dough. Let's explore exactly what's going on during the autolyse, and how it can better your bread baking.
A brief history of the autolyse method
French scientist and staff of life skillful Prof. Raymond Calvel developed this technique in 1974, in response to what he saw as a deterioration in French bread production.
In the 1950s and '60s two-speed electrical mixers came into apply in French republic, and bakers adopted more aggressive mixing practices. Co-ordinate to Calvel, this resulted in "very white and high in book" bread — which to his dismay began to gain popularity in France.
This intensive mixing caused the dough to mature more rapidly, which meant less fermentation time was required. Unfortunately, reducing fermentation resulted in bread with less flavor and keeping quality.
Excessive mixing also damaged the carotenoid pigments in the flour through over-oxidation. This caused a loss of crumb color (whiter bread) and a reduction in smell and flavour.
Calvel saw this equally a grave degradation of traditional French staff of life, and sought to bring back the wonderful breads he'd known in his youth.
Why use an autolyse?
Calvel demonstrated that using the autolyse method affects dough development in many positive ways:
- The flour fully hydrates. This is specially useful when working with whole-grain flour considering the bran softens equally information technology hydrates, reducing its negative result on gluten evolution.
- Gluten bonds begin developing with no endeavour on the part of the baker, and kneading fourth dimension is consequently reduced.
- Carotenoid pigments remain intact, leading to better color, odour, and flavour.
- Fermentation proceeds at a slower pace, allowing for full flavour development and meliorate keeping quality.
- The dough becomes more extensible (stretchy), which allows it to expand easily. This leads to easier shaping, greater loaf volume, a more open crumb structure, and cuts that open more fully.
What's not to love?
The science backside the autolyse method
I was trying to explicate the autolyse method to my sister, who's a pathologist, and her optics lit upward: "Autolysis!" In her world this procedure describes the self-digestion or destruction of tissue by its own enzymes.
Equally it turns out, this is exactly what'due south going on during an autolyse.
Two enzymes that are present in flour — protease and amylase — begin their work during the autolyse:
- The protease enzymes degrade the protein in the flour, which encourages extensibility.
- The amylase enzymes plough the flour's starch into sugars that the yeast can swallow.
Proper dough evolution requires a residual of both extensibility and elasticity. Past delaying the add-on of yeast, sourdough starter and salt (all of which tin have a tightening effect on gluten), the extensibility of the dough has a ameliorate chance to develop. Once kneading begins, the dough develops elasticity, which is the quality that allows the dough to retain its shape.
Testing the autolyse method
When I began this project I was convinced it would be like shooting fish in a barrel; how hard could it exist to demonstrate the well-documented positive results of using the autolyse method?
So things got a trivial messy.
My test loaves didn't always illustrate the promised dramatic results, and using the autolyse method wasn't always as piece of cake as I expected.
While I certainly don't dispute Calvel's findings, sometimes production blistering practices need a little tweaking when information technology comes to utilizing them in your dwelling baking.
Allow's run into what my tests reveal most the best way to add the autolyse method to your bread-blistering routine.
Choosing autolyse friendly recipes
Strictly speaking, an autolyse includes just the flour and water in a bread recipe. Salt tends to tighten gluten, as does the fermentation brought nearly by the addition of yeast or sourdough starter. Since these ingredients work confronting the development of extensibility, they are omitted from the autolyse.
However, when a recipe includes a liquid sourdough starter or a preferment, information technology's added to the autolyse likewise. Without the pregnant percent of liquid independent in these starters information technology would be impossible to properly hydrate the flour during the autolyse.
For testing purposes, I chose recipes that either didn't include a liquid preferment, or called for a stiff sourdough starter that could be added after the autolyse.
While an autolyse can be added to virtually any staff of life recipe, my rationale is that these recipes will show the purest results when it comes to the effects of adding an autolyse.
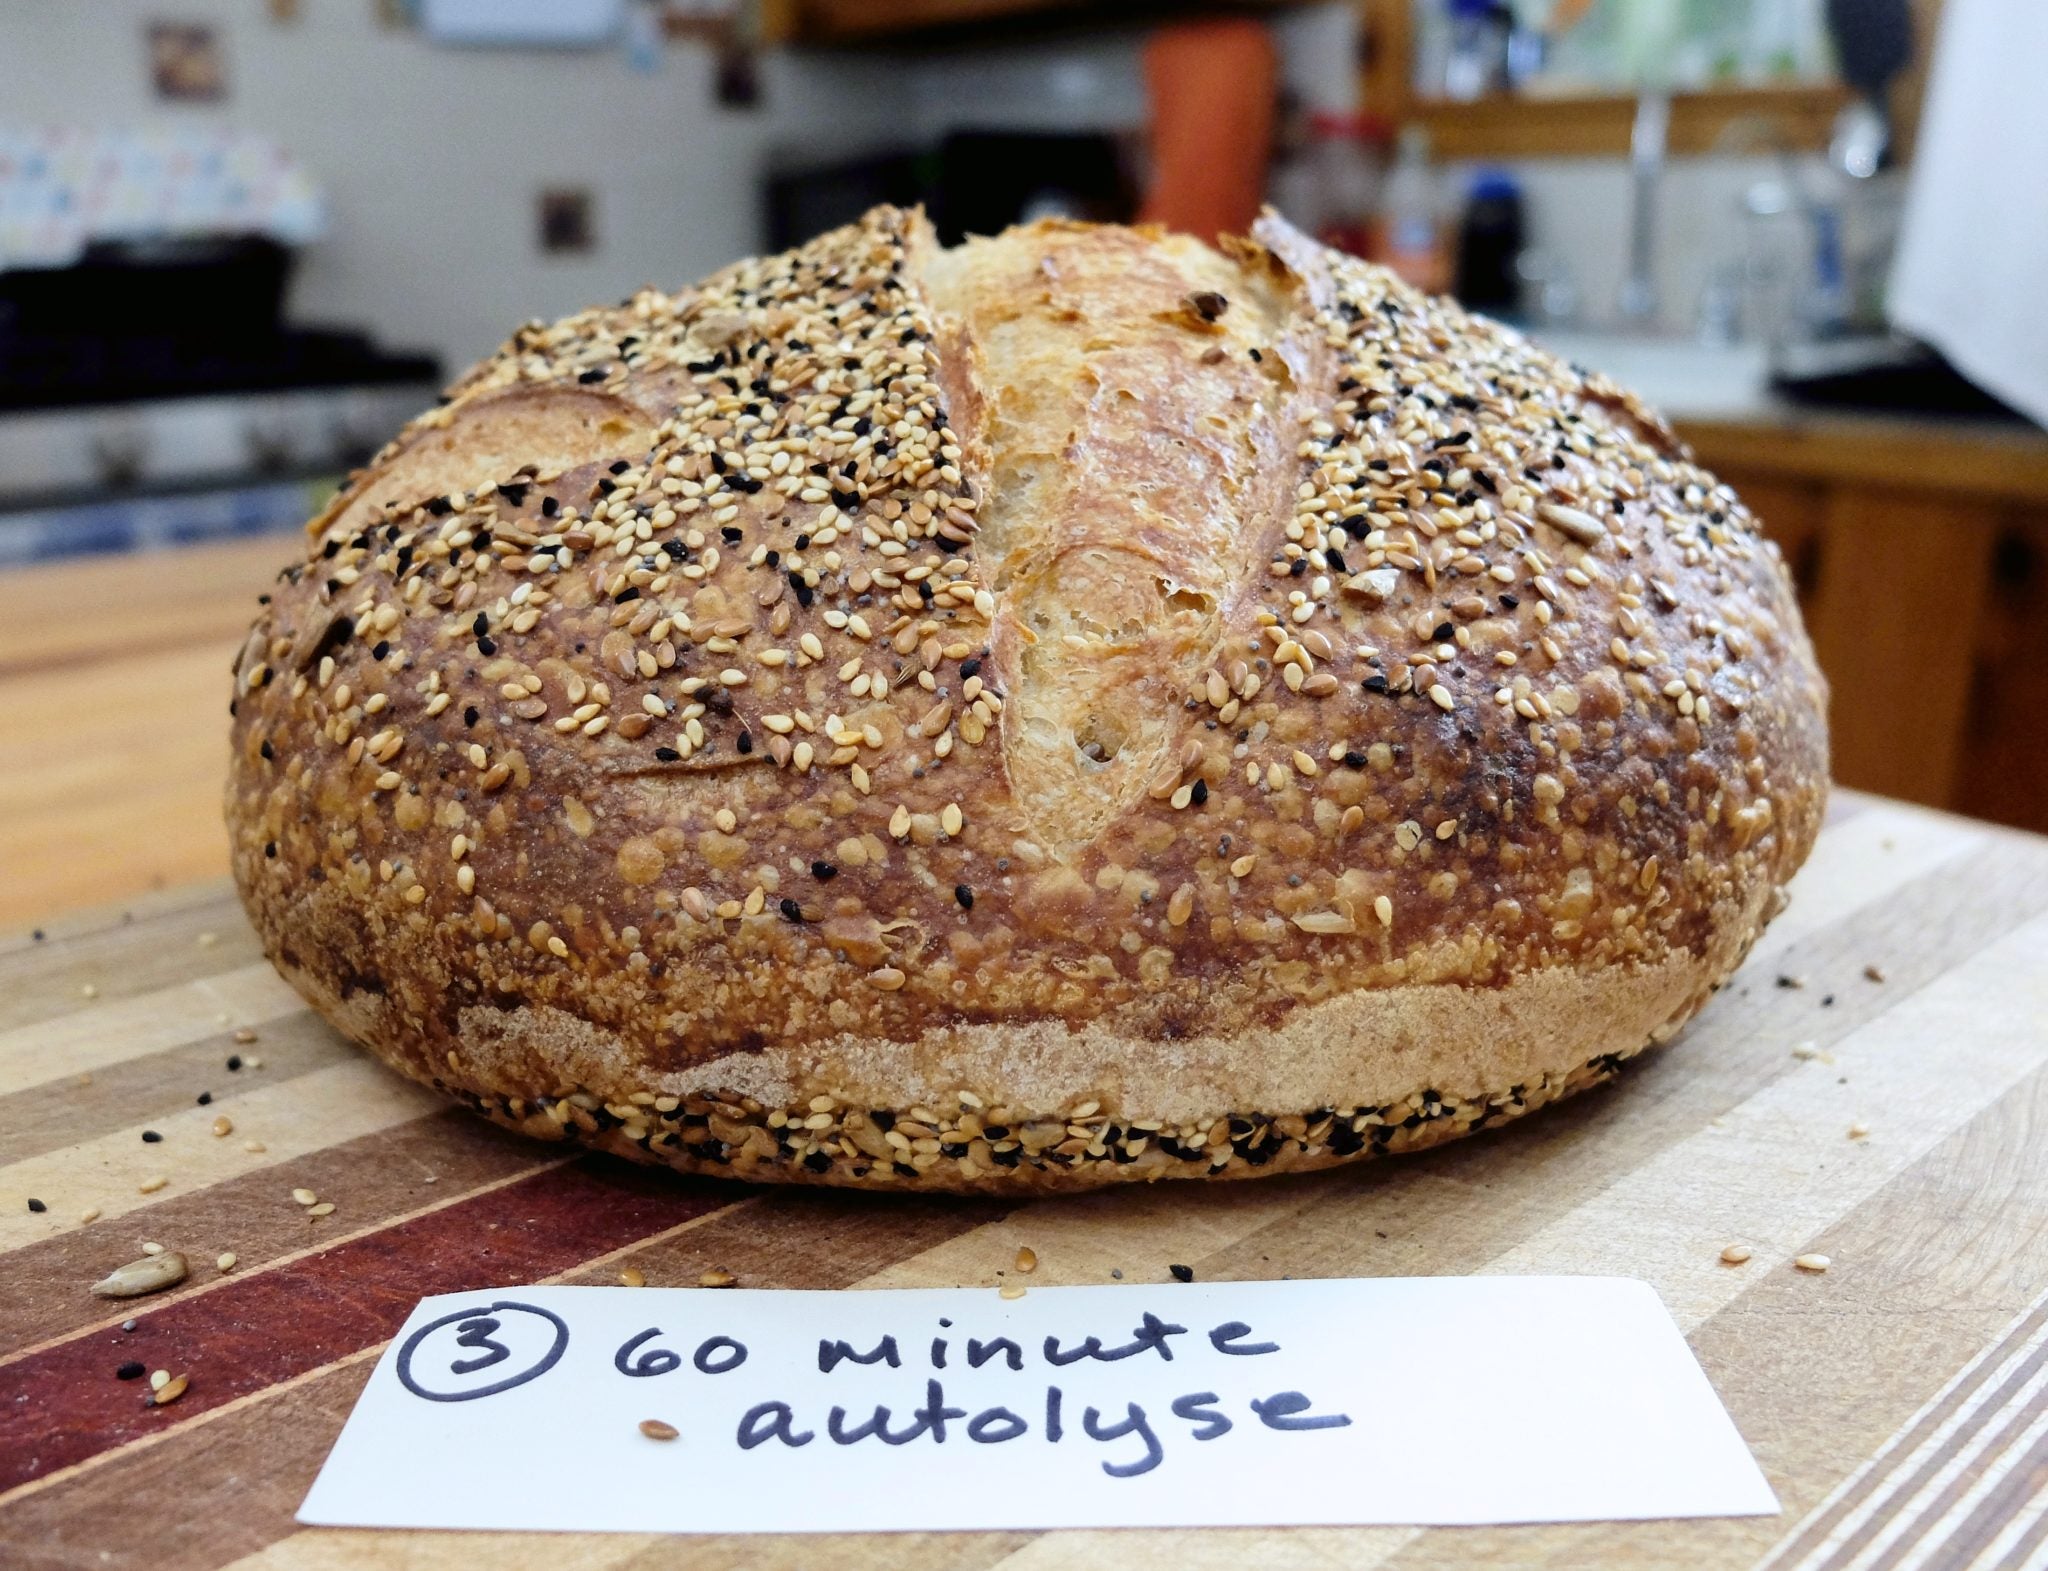
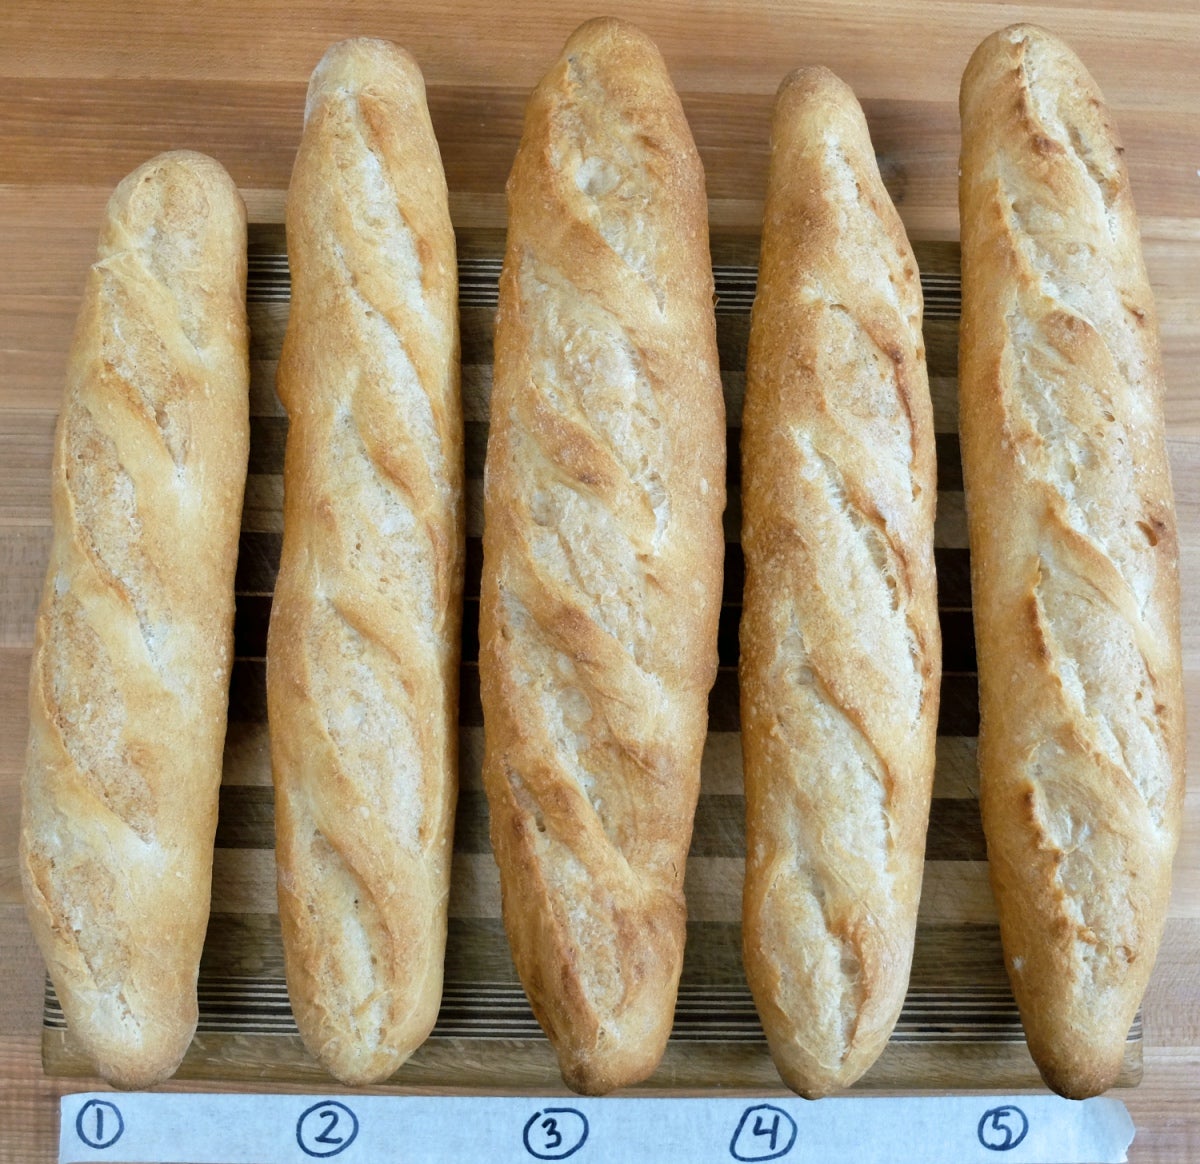
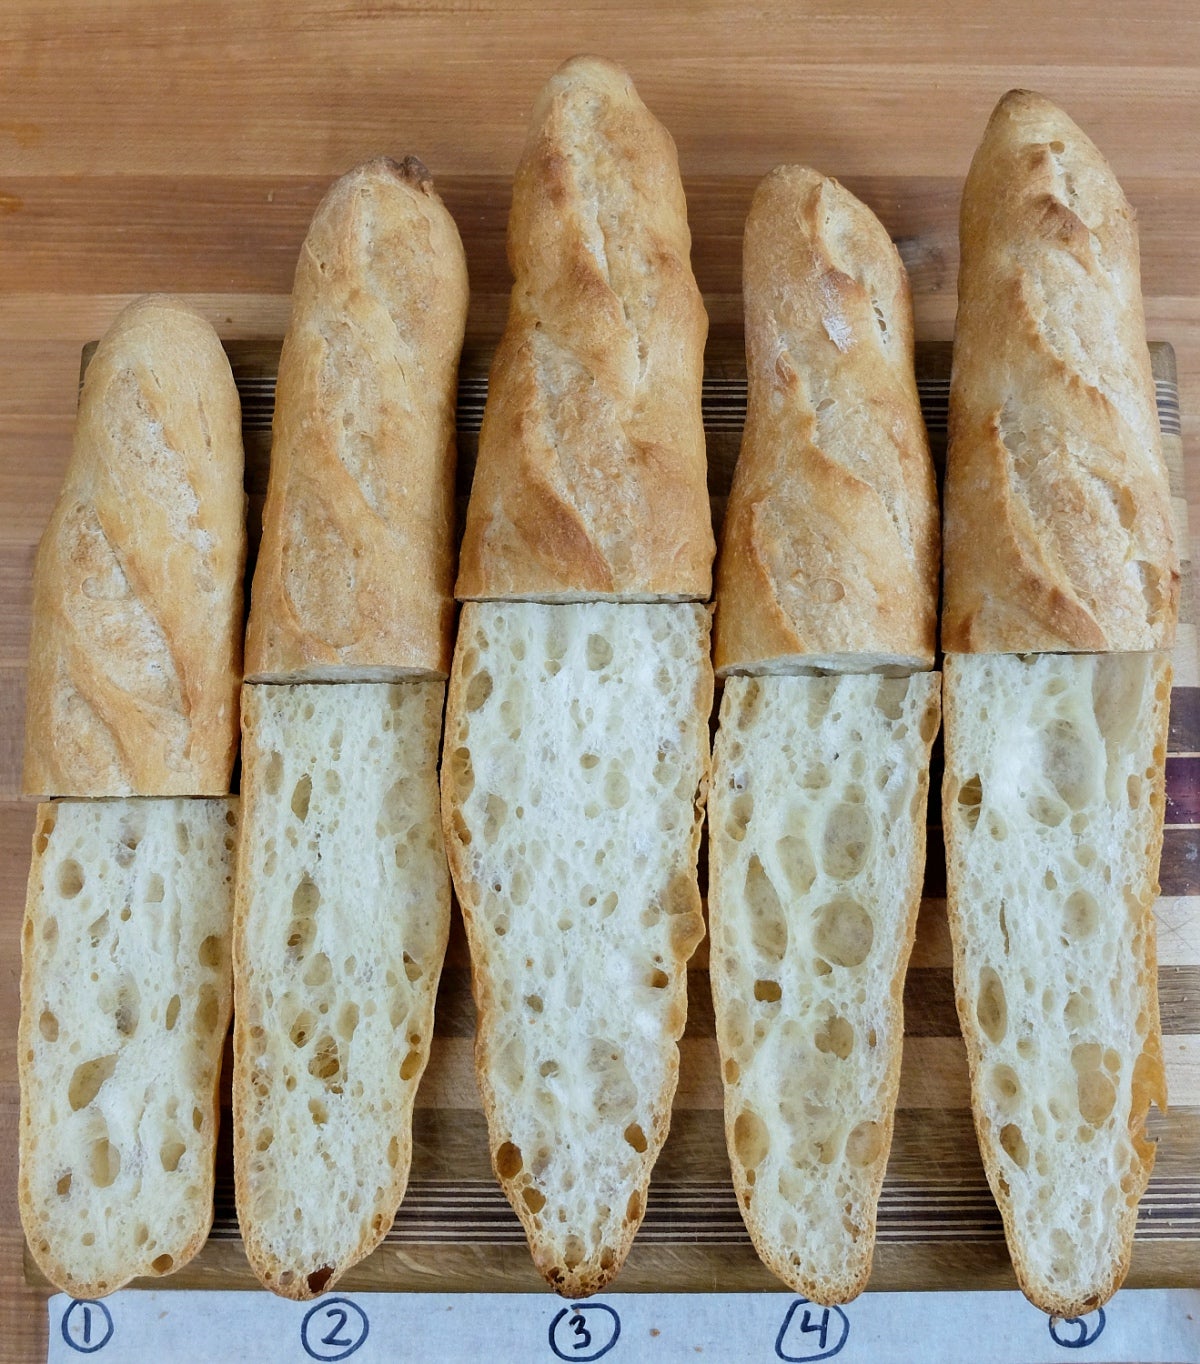
Test #one: Artisan Sourdough Staff of life with a Stiff Starter
This recipe makes one big boule, but I'll cut it in one-half and brand sourdough demi-baguettes; baguettes make for an easy side-by-side comparison.
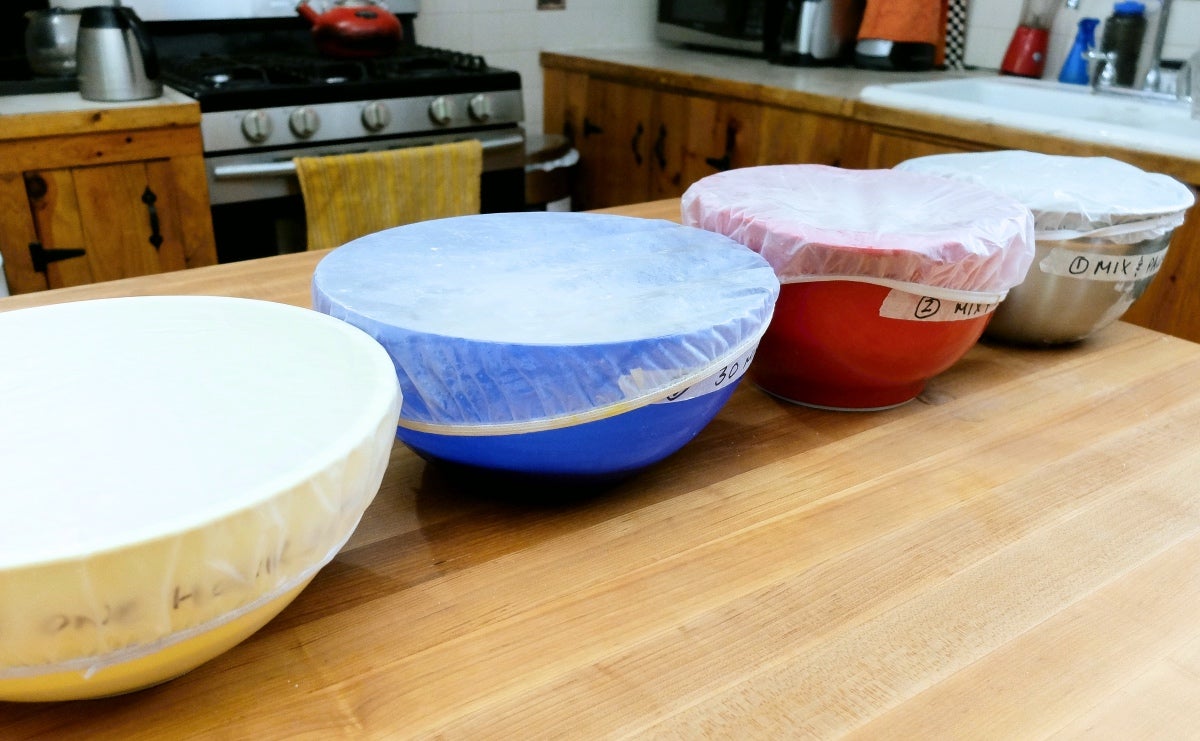
For consistency'south sake I'll utilise my KitchenAid mixer with the dough hook, and attempt to keep the mixing and kneading times the same for each dough. My standard mix time volition exist 3 minutes on the everyman speed (stir). Kneading fourth dimension will be 2 minutes on speed 2.
The dough is always covered during a rest period.
Hither'southward what I'll examination with this recipe:
Dough #1, no autolyse or suspension: All the ingredients are added at once and immediately mixed and kneaded. Mix/kneading time is 3 minutes on "stir" and 2 minutes on speed ii.
Dough #2, mix and xxx-minute intermission:A gentle mix of all the ingredients, followed by a xxx-minute suspension.The dough is so kneaded.
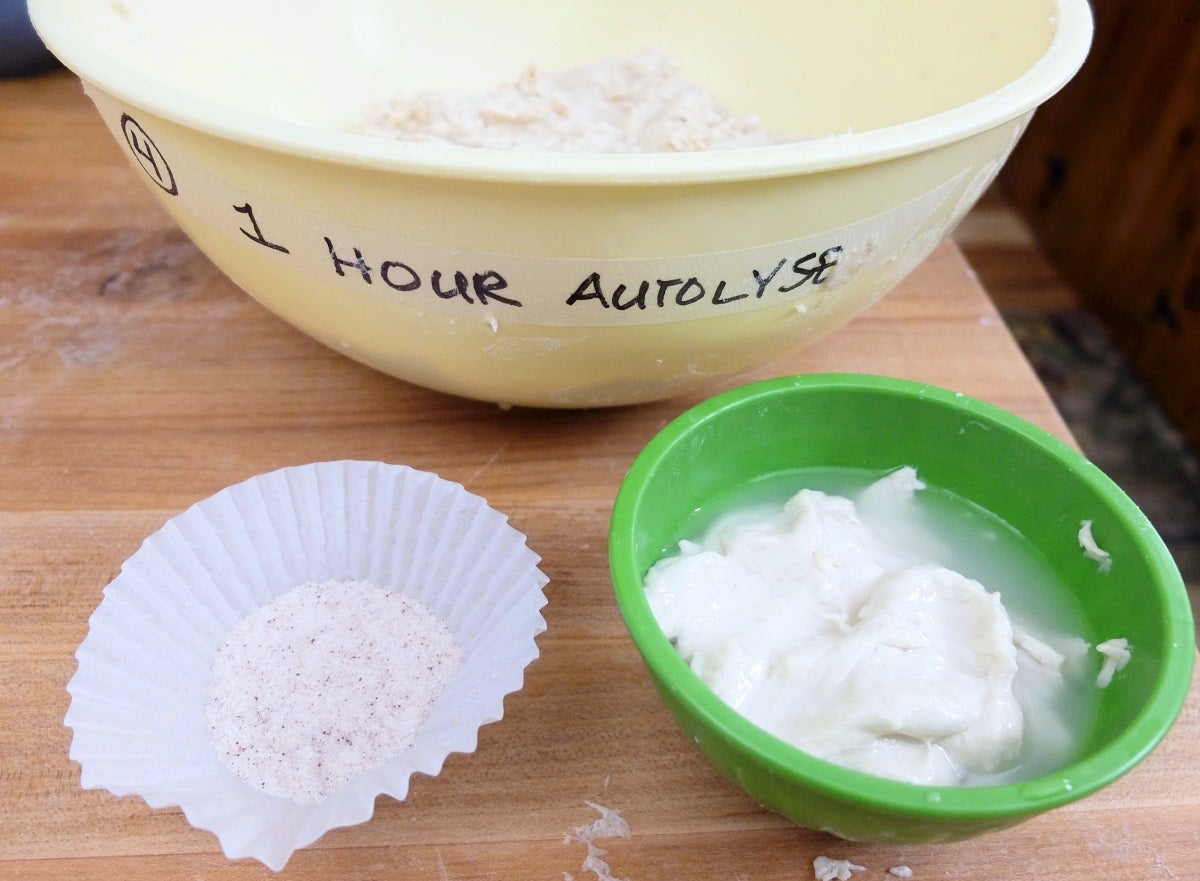
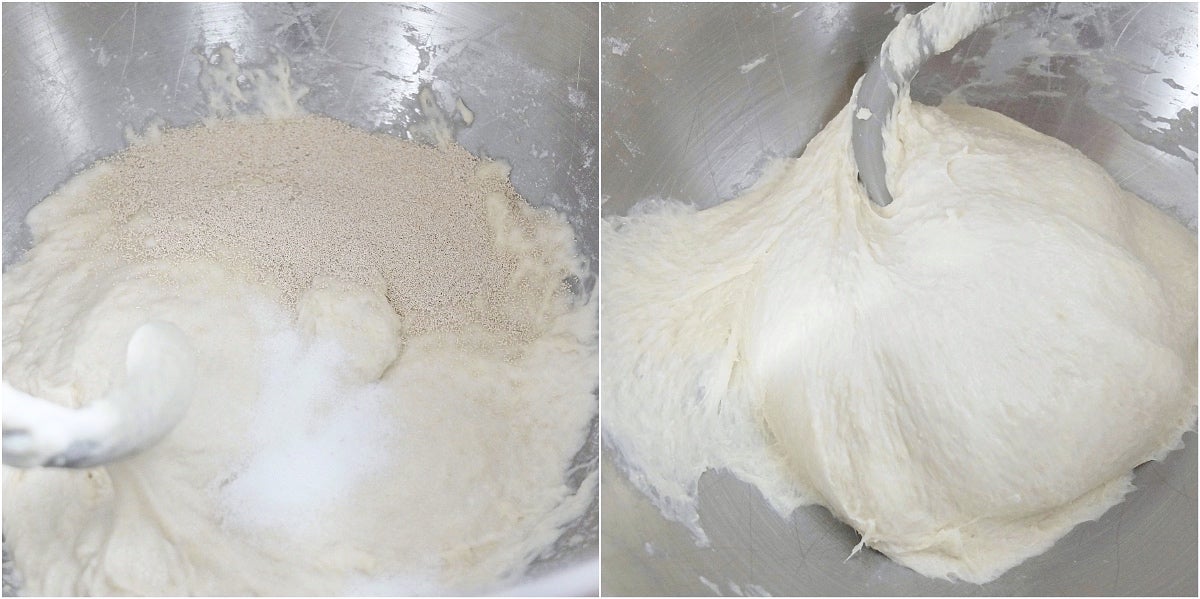
Dough #iii, 30-infinitesimal autolyse: The flour and water are gently mixed and the dough is allowed to rest for 30 minutes. Afterwards the autolyse the table salt and sourdough starter are added and the dough is kneaded.
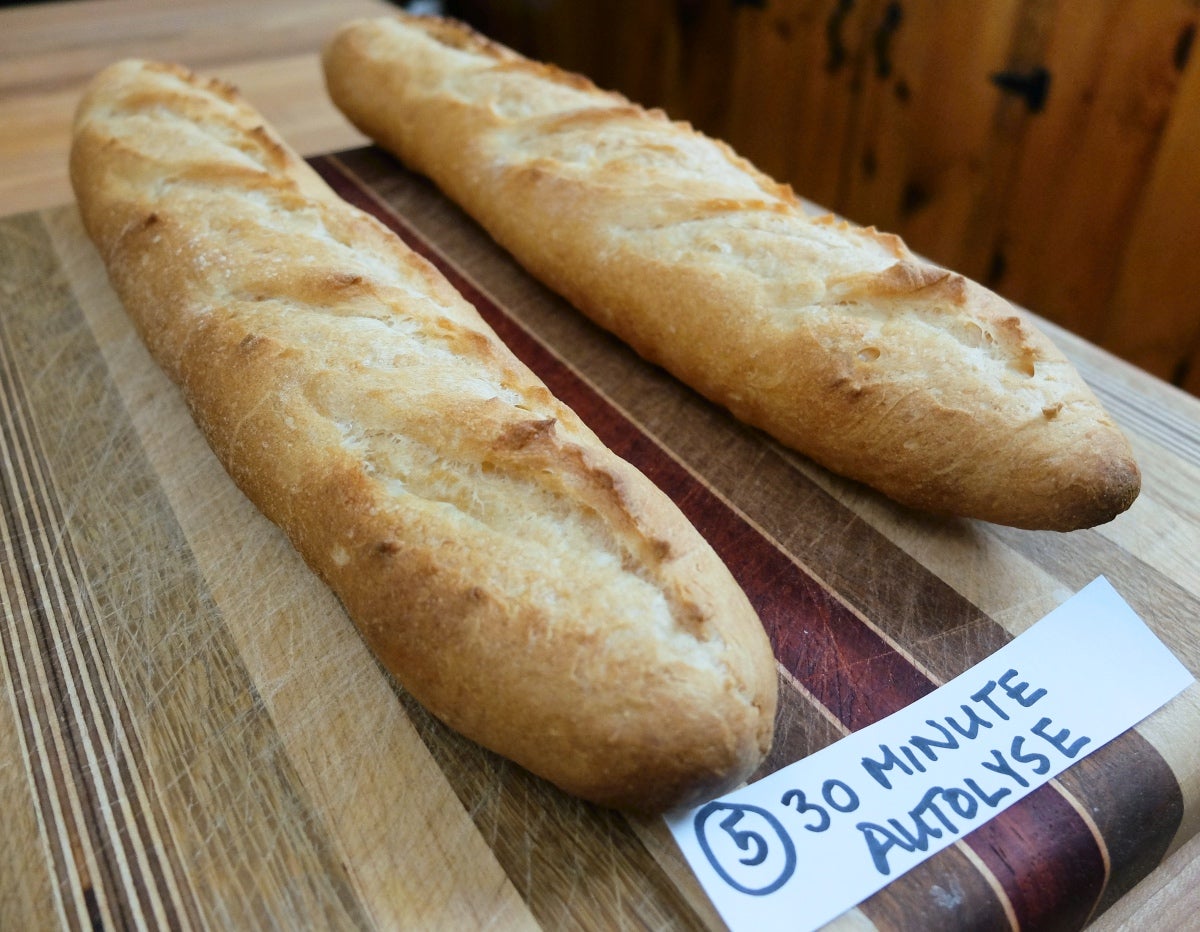
Dough #four, 60-minute autolyse: The same process equally the xxx-minute autolyse, but with a 60-minute residuum.
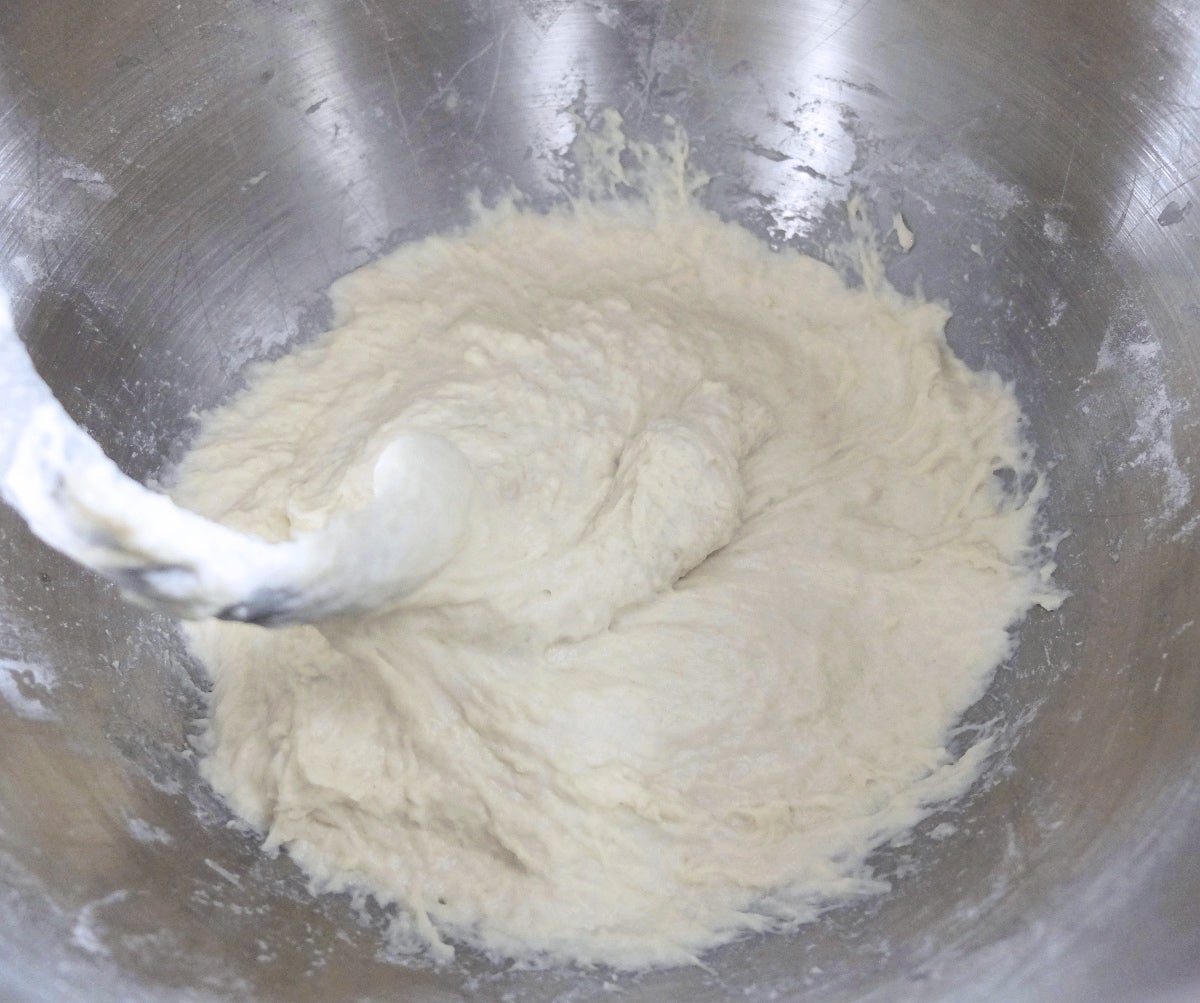
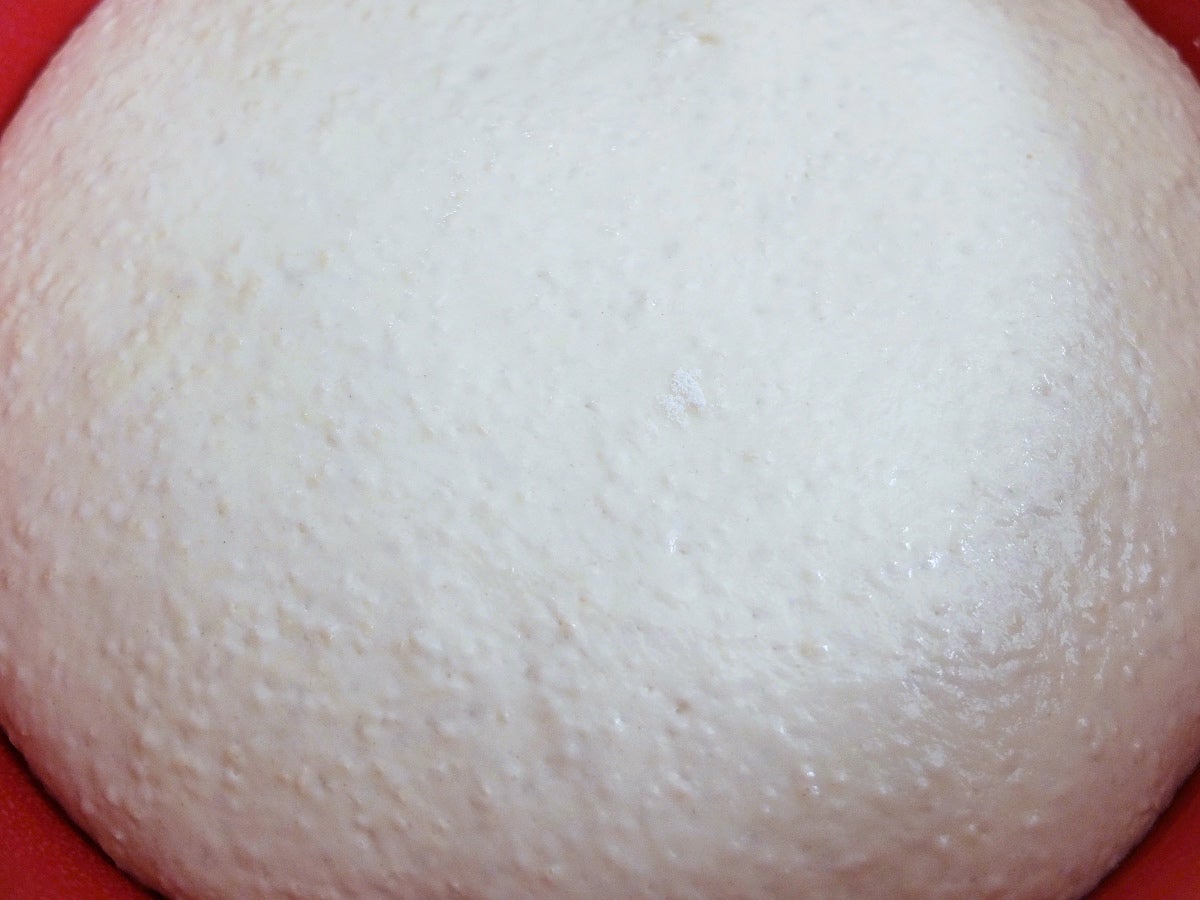
Dough #1 and dough #2 come together easily, and dough #3 starts out nicely as well. For the autolyse, I only mix the flour and water together until the flour is fully moistened. I so embrace the bowl and let the dough residuum for 30 minutes.
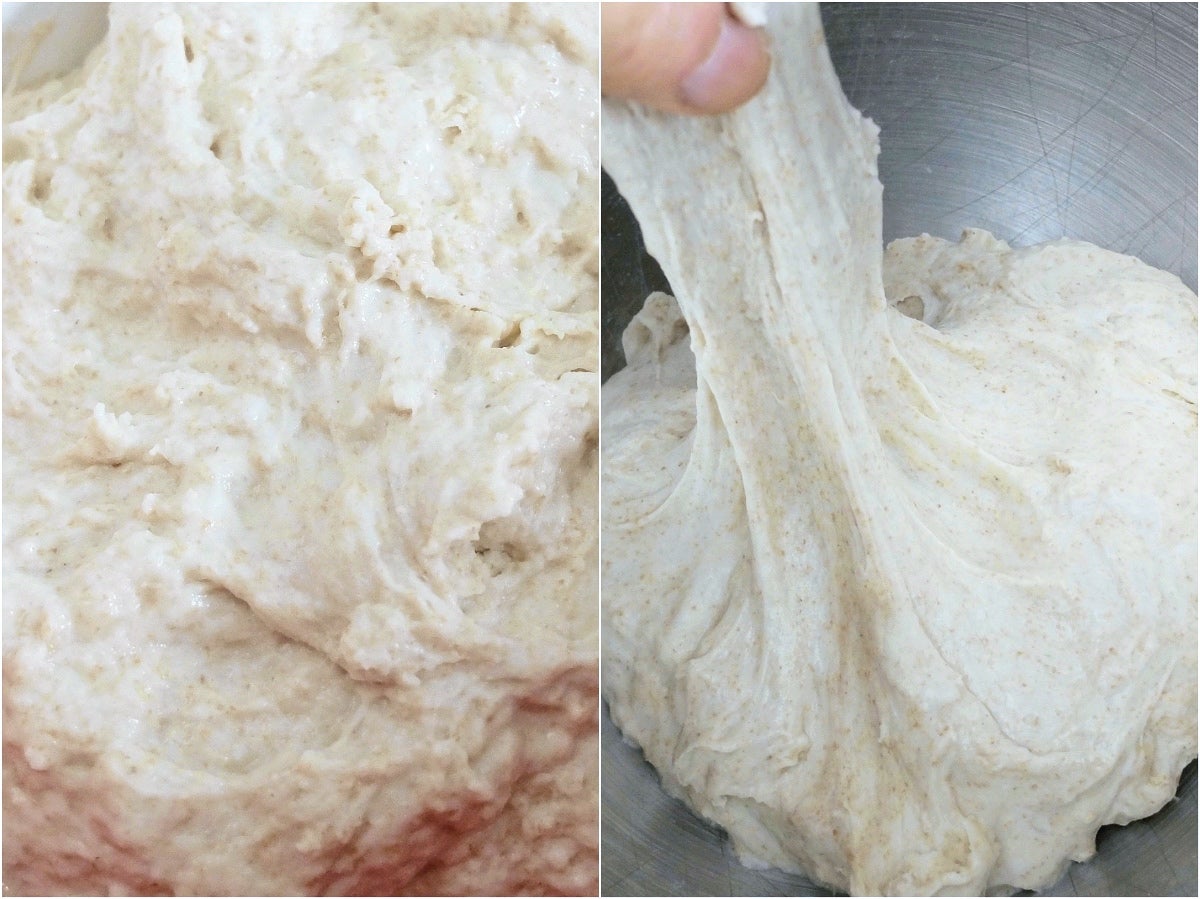
It's truly miraculous to observe how the dough transforms in thirty short minutes from a rough blob to a polish and stretchy dough.
Difficulties with incorporation subsequently the autolyse
However, when it comes time to add the potent starter and salt to dough #3, I run into a small hitch: the starter and dough don't want to come together.
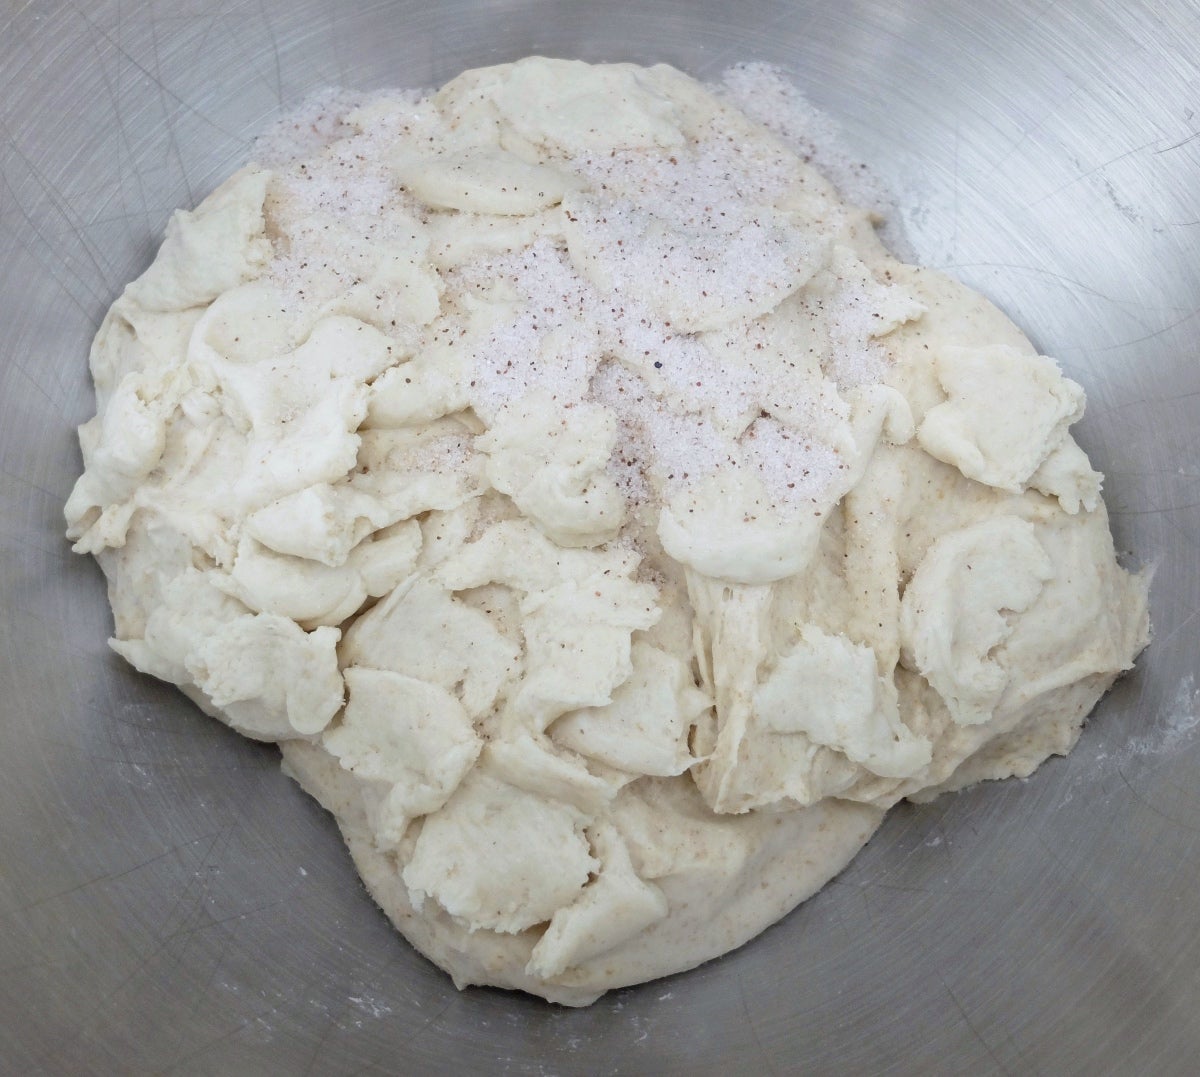
I kickoff effort ripping the starter into pocket-size pieces and sprinkling the table salt on top of the dough, but piddling bits of starter remain intact, fifty-fifty after kneading for 2 minutes on speed 2.
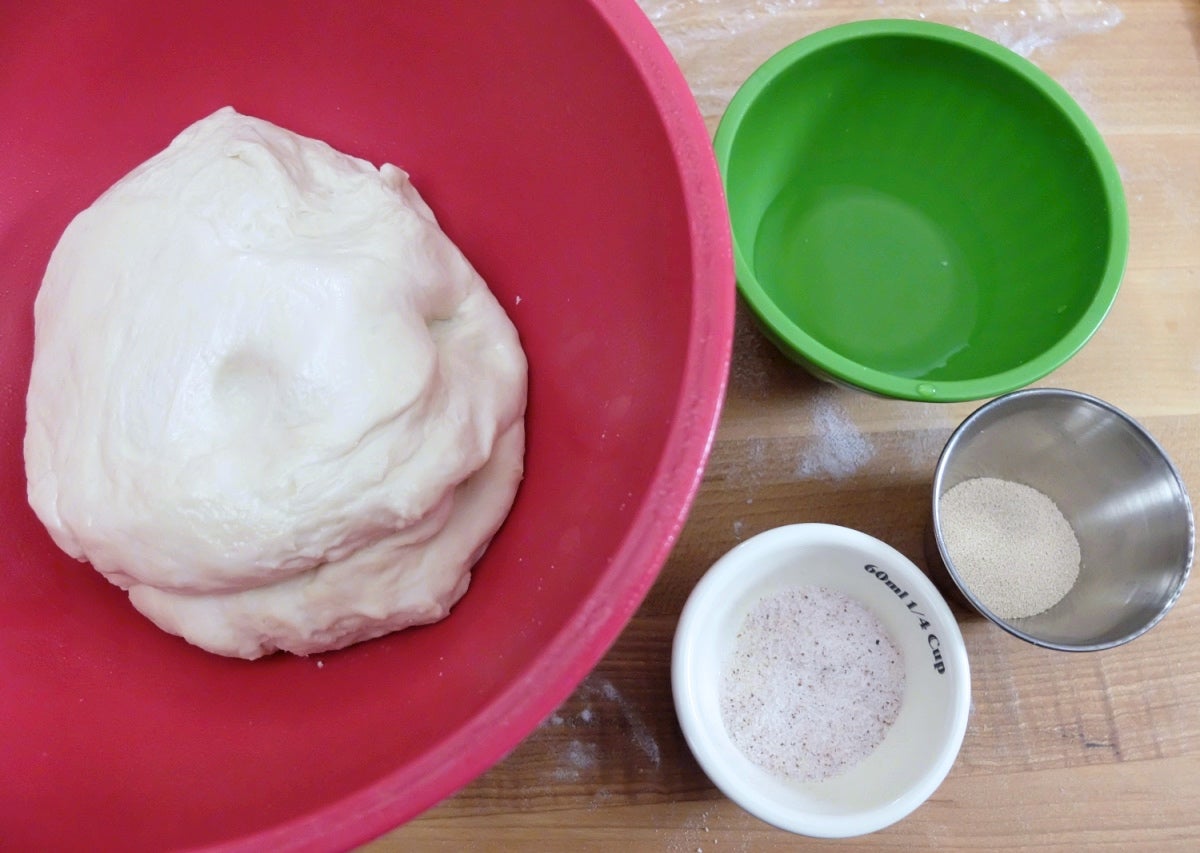
When I mix the lx-infinitesimal autolyse for dough #iv, I effort a different tactic.
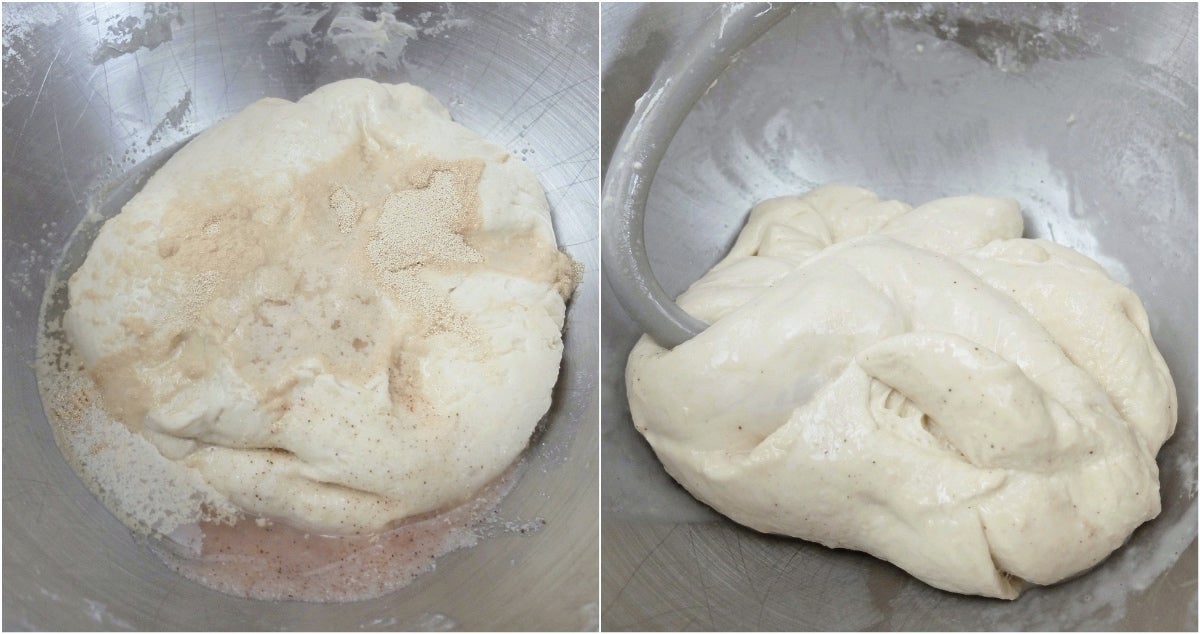
I decide to reserve a pocket-size corporeality of the recipe'south water (20g) to soften the stiff starter prior to adding it (forth with the common salt) to the dough and kneading. This also proves challenging to mix because the water causes the dough to slide around in the mixer, preventing the hook from engaging.
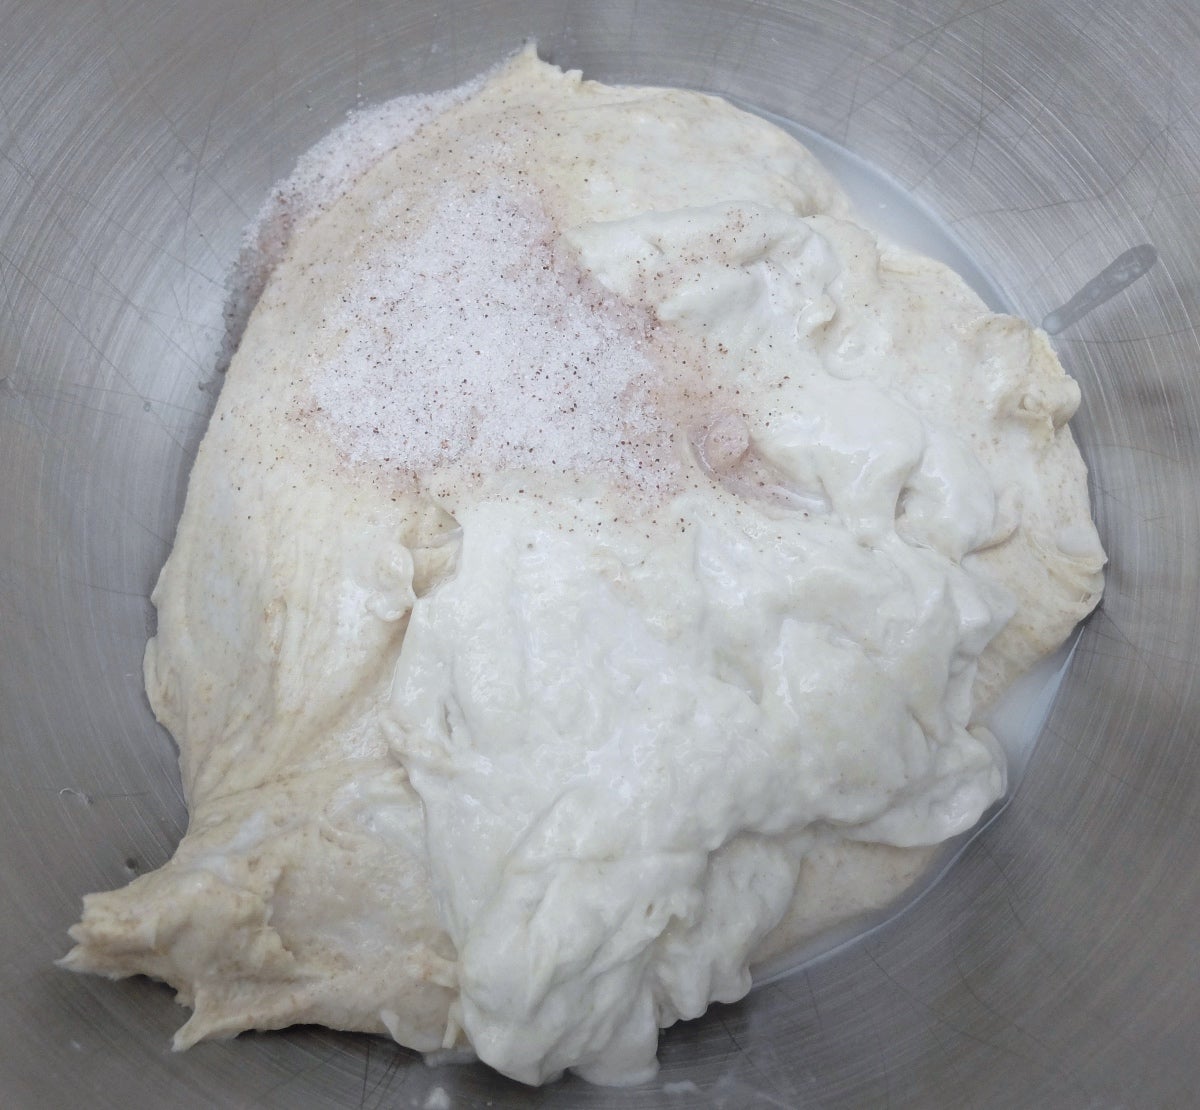
Information technology's necessary to gently mix on the lowest speed, pausing ofttimes to fold the dough and assistance it engage with the hook.
While these added precautions piece of work, they definitely have more fourth dimension. If less required kneading is a positive result of using the autolyse method, struggling to comprise the starter before you tin begin kneading is definitely a drawback.

Test #ane results
With all that extra effort to incorporate the starter properly after the autolyse, I'm a bit disappointed to encounter so little bang for my cadet. The loaves that include an autolyse (#three and #iv) do show greater expansion, but there'southward not a dramatic difference.
Dough #1: The mix that received no autolyse or interruption produces a slightly smaller baguette, with a more erratic crumb structure than the other test loaves.
Dough #ii: The mix and pause method produces the best colour, crumb, and scoring.
Dough #3: The thirty-minute autolyse yields a robust loaf with a decent nibble, but nothing to write home nigh.
Dough #iv: The 60-minute autolyse produces the largest baguette, but the nibble isn't as open as #i, #2 or #3.
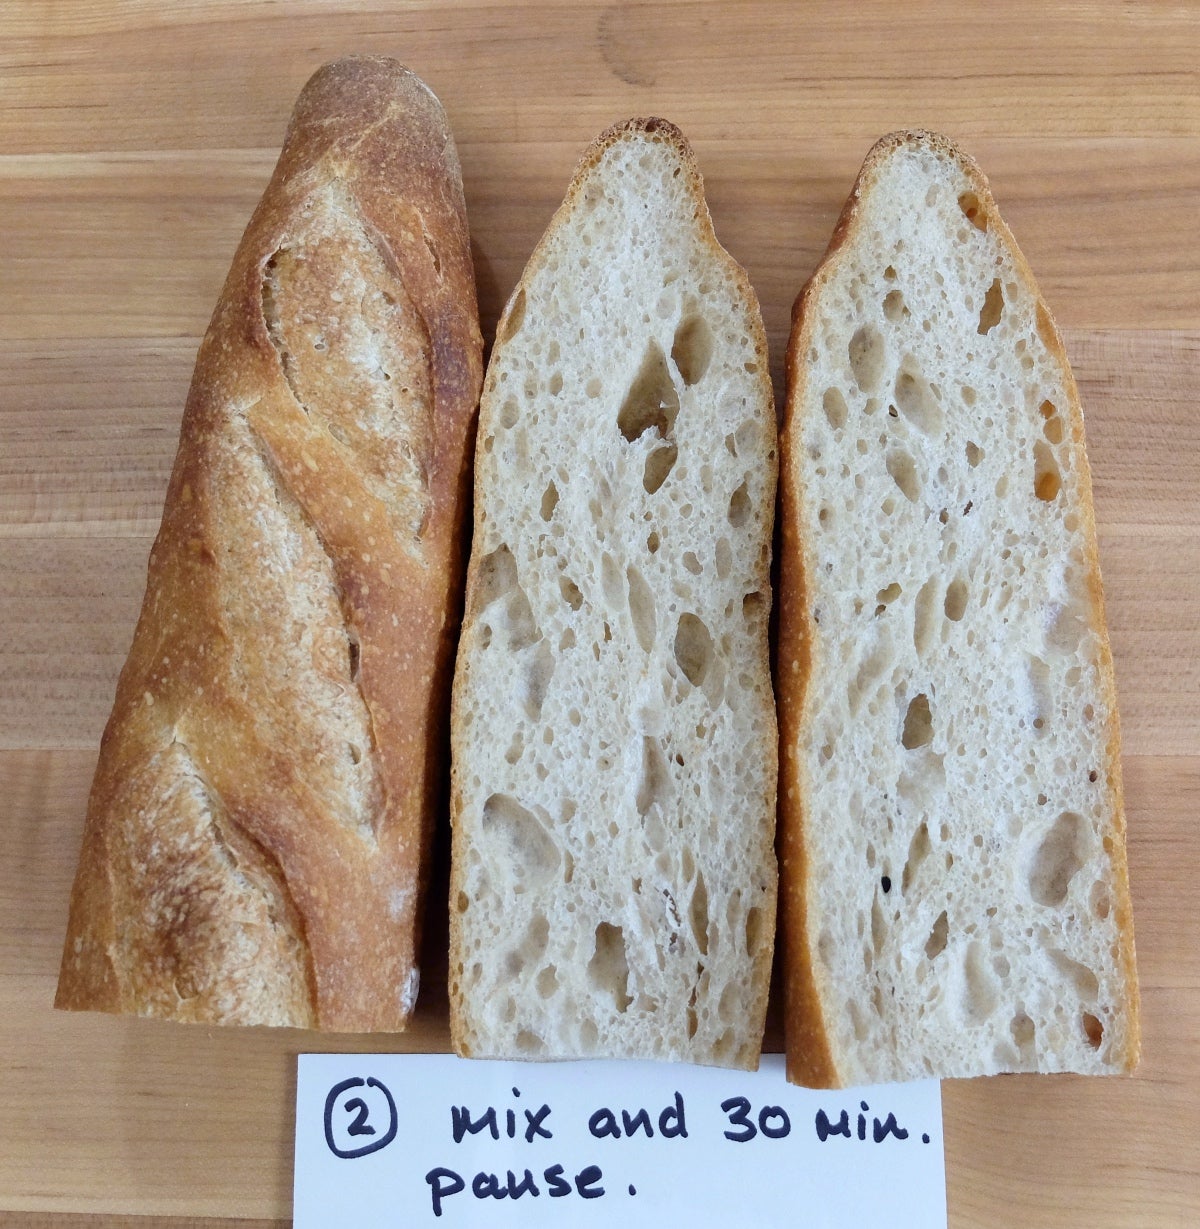
The winner of this round is dough #2.
Test #2: French-Mode Baguettes
For this recipe I'll use the same mixing/kneading process equally I did in the kickoff test: 3 minutes on "stir" to blend the ingredients, and 2 minutes on speed 2 to knead the dough. The but exception to this will exist the intensive mix (Dough #1).
Here's what I'll test with this recipe:
Dough #1, intensive mix : Replicating the intensive mixing practices that drove Calvel to develop the autolyse method risks destroying my mixer — don't attempt this at home! I mix all the ingredients and so knead for a full fifteen minutes on speed 2 in my KitchenAid mixer.
Dough #2, mix and pause: All of the dough ingredients are mixed together so allowed to residue for 30 minutes. While not quite an autolyse, this is certainly autolyse inspired. Afterward the pause, the dough is kneaded.
Dough #3, 60-infinitesimal autolyse: The flour and water are gently mixed and allowed to rest for hour. After the rest, the salt and instant yeast are added and the dough is kneaded.
Dough #4, 30-minute autolyse with yeast: The flour, water, and instant yeast are mixed together in the autolyse. After the 30-infinitesimal residual, the common salt is added and the dough is kneaded.
Dough #5, 30-infinitesimal autolyse: No common salt or instant yeast are added to the autolyse. Subsequently the 30-minute residuum, the salt and instant yeast are added and kneading commences.
An unexpected snag
Doughs #i and #ii come together without incident (my mixer doesn't die)! But when I go to dough #3, I discover an issue that I hadn't anticipated.
I mix the flour and water and permit the dough to residual for 60 minutes.
Afterward the autolyse, the yeast and salt are added and I knead on speed 2 for 2 minutes.
Uh-oh!
The instant yeast doesn't dissolve properly when added to the fully hydrated flour. The dough is riddled with undissolved yeast granules at the end of the first rise.
Back to the drawing board.
Examination #2-A
This time when I come to d ough #three and dough #five I reserve a pocket-sized corporeality of the water (i ounce) from the autolyse, to add in along with the instant yeast and table salt subsequently the autolyse is complete.
This method has its own issues. The yeast dissolves nicely; unfortunately, the dough has difficulty accepting the water/yeast/salt mixture: it's necessary to end and start the mixer repeatedly to go far happen.
Some other pick is to add together the yeast with the autolyse, as I did withdough #iv. This is what bakeries using instant yeast usually do; merely how do the resulting baguettes compare?
Let's bake them and see.
Test #2-A results
Dough #1: The intensive mix actually turns out ameliorate than expected, with a decent crumb structure. However, information technology's much more difficult to roll out, and the resulting baguette is minor and pale: definite proof that more isn't better when it comes to kneading staff of life dough.
Dough #2: The mix and pause method also yields fairly positive results. Good crumb, decent volume, and cuts that open reasonably well.
Dough #3: Wow! The60-minute autolyse actually shines in this examination (though the loaf may take been a little over-proofed). Great colour, volume, and crumb, along with decent cuts.
Dough #4:The thirty-minute autolyse with yeast yields another beautiful baguette. While non quite as big as #3 and #5, it's adjacent in line for size, and has a very open crumb.
Dough #five: The30-minute autolysewithout salt or yeast is the winner of this round. Beautiful crumb, color, and volume. I even get some ears!
The winner!
One final test
Baking 5 rounds of baguettes is but about my limit for i day, so I determine to air-condition some of the extra baguette dough from examination #2-A and shape and bake it the next mean solar day.
Dough #ane:After refrigeration, the intensive mix once once more produces a small, pale baguette. None of the baguettes have as open up a crumb structure every bit the baguettes that were baked the mean solar day before, but the interior of this baguette looks particularly tough and ropey.
Dough #ii: The mix and pause methodyields a reasonably overnice baguette, but it's also paler and smaller than dough #3.
Dough #3:The lx-minute autolyse is the articulate winner of this round. It yields the largest baguette, with a smashing crust color and cuts that open beautifully.
To autolyse or not to autolyse?
One advantage of using an autolyse that I haven't been able to capture in these photos is the tremendous divergence it makes in the feel and workability of the dough. Calvel called French bread fabricated using the autolyse method "more seductive." I think he was referring to the baked loaves, but dough that's undergone an autolyse feels more seductive. It has a soft and yielding strength that makes rolling out baguettes a truthful pleasance. It'south worth giving the autolyse method a try for this reason alone.
Takeaways for using the autolyse method:
- When mixing the autolyse be sure that all the flour is fully moistened; dry flour won't contain well later in the process.
- Don't utilise an autolyse with sourdough rye staff of life. Because rye flour doesn't develop gluten the way wheat flour does, and also ferments more speedily, adding an autolyse tin can cause the dough to deteriorate.
- Liquid preferments and starters are always included in the autolyse.
- To add instant yeast and/or a stiff sourdough starter after the autolyse is complete, dissolve them in a pocket-sized amount of water (one ounce) reserved from the autolyse. Mix gently until the ingredients are fully incorporated before beginning to knead.
- Common salt is adequately easy to incorporate after the autolyse, so delaying this ingredient isn't difficult and tin have a big impact. But don't forget to add information technology after the autolyse! Sprinkle the salt on superlative of the autolyse if you're agape you'll forget to add together information technology later.
- If yous plan to filibuster calculation any ingredients — common salt, yeast, and/or starter — mensurate them out and place them next to the autolyse. This will help forbid a potential disaster!
- I wasn't able to discern a meaning departure in crumb color, scent or season in the baguettes that included an autolyse. I suspect those with more sensitive noses and tongues may notice these differences better than I tin can.
- Is a longer autolyse more beneficial than a short one? More than experimentation is necessary, simply this may well vary from one recipe to the next.
- If yous notice a true autolyse inconvenient, you'll even so run into benefits by calculation a thirty-minute residue between mixing all of the dough ingredients and kneading.
I hope you'll feel inspired to start using an autolyse in your staff of life baking.
And let us know how using the autolyse method works for yous!
Source: https://www.kingarthurbaking.com/blog/2017/09/29/using-the-autolyse-method
0 Response to "How Do You Know When Autolyse Is Done Sourdough"
Post a Comment